
A properly calibrated thermometer is an essential tool for managing food safety, making sure food is cooked properly and stored at the right temperature to prevent harmful bacteria growth.
From checking the internal temperature of meats to monitoring refrigeration and freezer conditions, a thermometer helps you maintain food safety at every stage. Inaccurate readings can lead to undercooked food, a breeding ground for bacteria, or spoilage, putting your customers at risk. That's why regular calibration is required to guarantee your thermometer is always giving you the correct information.
In this guide we cover calibration techniques, including adjustments for different altitudes, and show you how to easily record calibration data. By following these steps, you can ensure your thermometers are always precise and help protect your customers from food borne illness.
Why does a thermometer need calibration?
Like any tool, thermometers can become less accurate over time. Regular use, temperature fluctuations, and even minor bumps can affect how precise they are. Calibration is essential to ensure your thermometer is giving you correct readings. By calibrating your thermometer regularly, you're guaranteeing that the temperatures you're measuring are reliable, protecting both your business and your customers. We recommend calibrating thermometers every 6 - 12 months or according to the manufacturers recommendations.
How to calibrate a thermometer
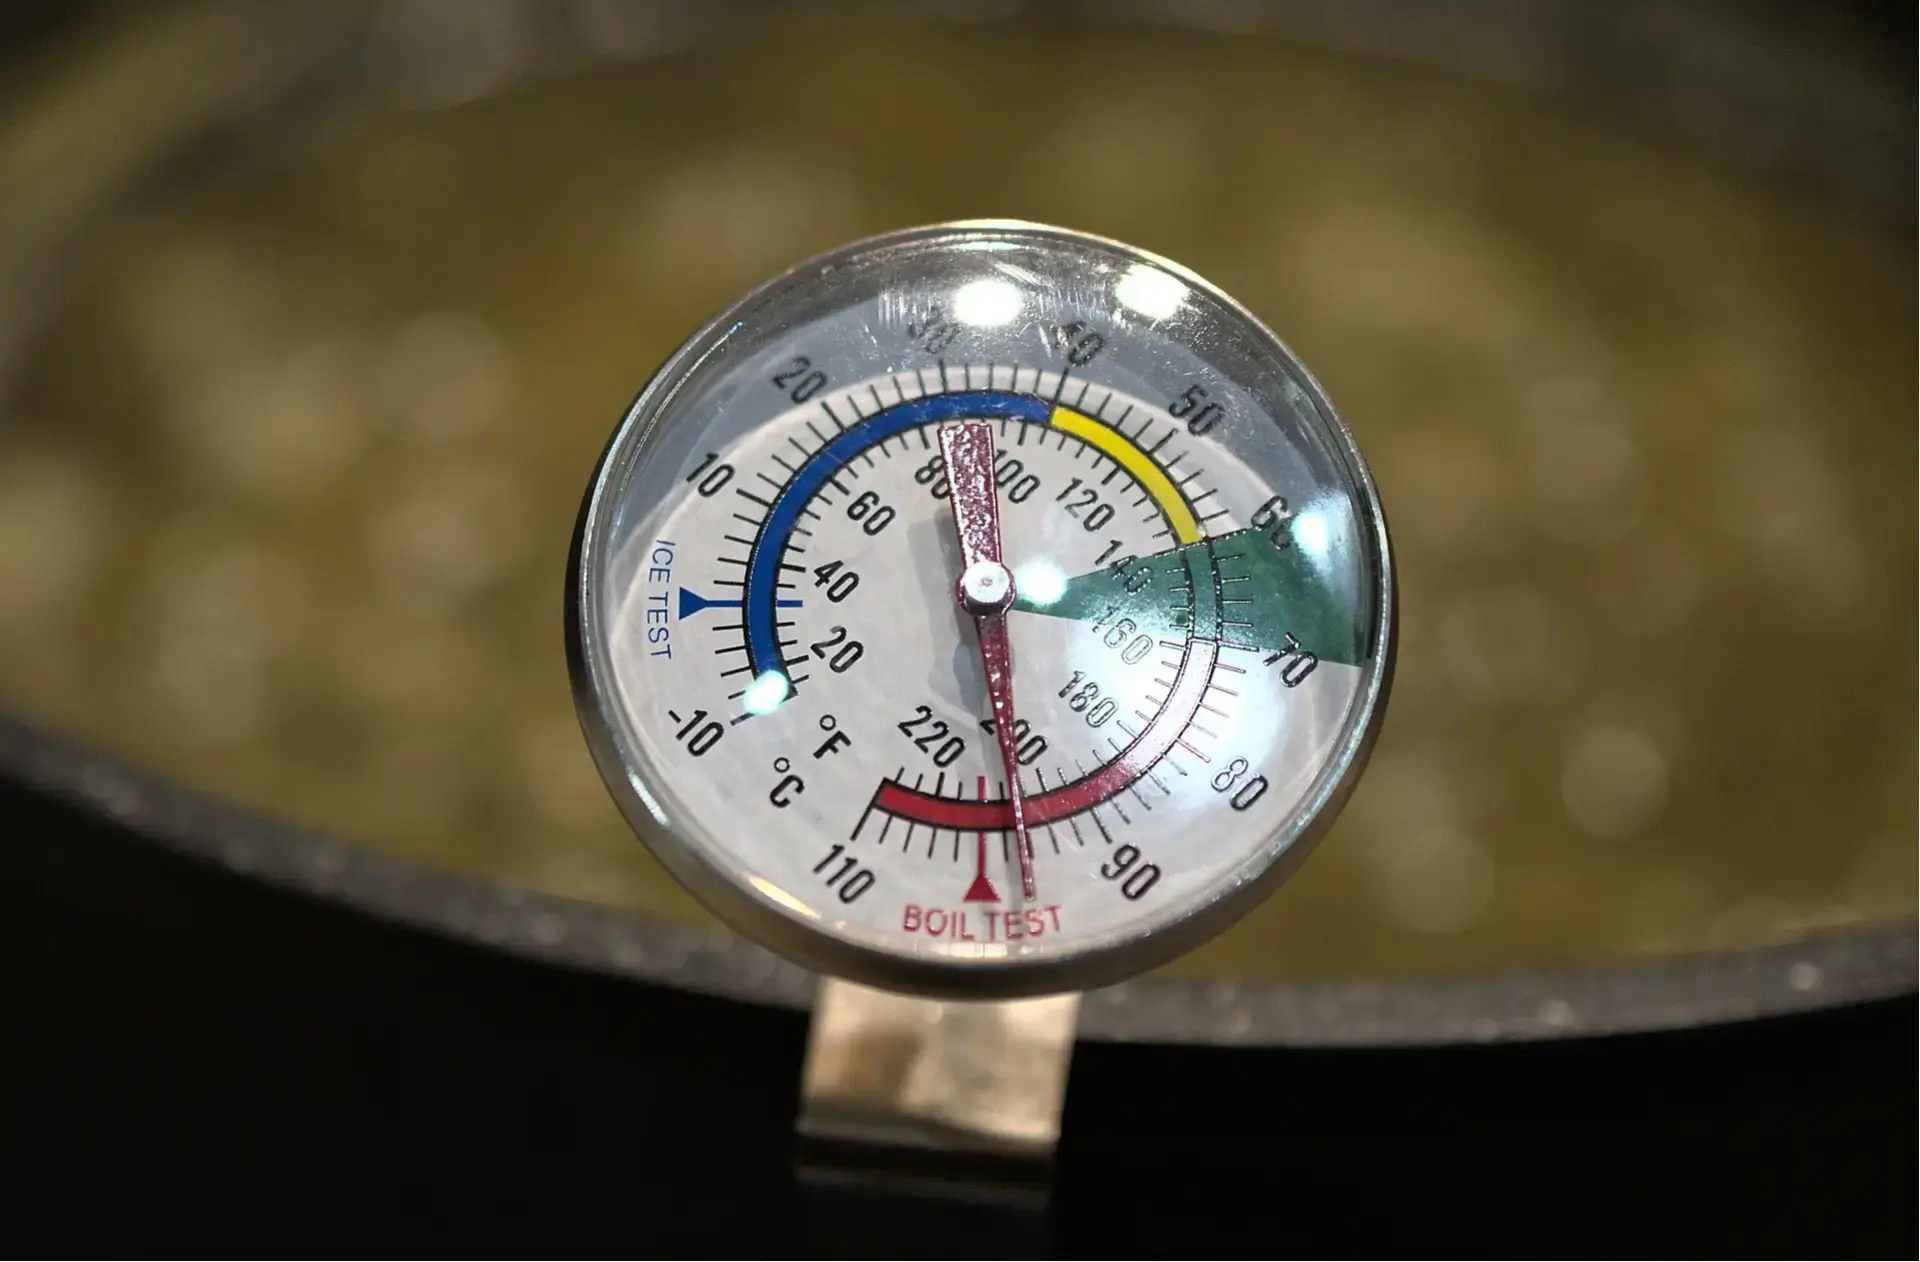
To calibrate a thermometer, you should use both the ice method and the boiling point method. This makes sure the thermometer is accurate in both the upper and lower ranges.
Ice point thermometer calibration
- Place ice into a container with a some cold water. The ice shouldn't float. If it does then you have too much water in the mix.
- Mix the ice and water into a slurry and insert the thermometer probe. Make sure the thermometer doesn't touch the sides or bottom of the container.
- Once the temperature is stable and hasn't changed for 30 seconds (depending on your thermometer this could take up to 3 minutes), check and record the temperature. It should read 0°C.
- Do this three times to make sure it is consistent. A variance of between -1°C and 1°C is ok. If it is more than you should replace your thermometer or have it serviced.
Boiling point thermometer calibration
- Bring a saucepan of water to a rolling boiling point.
- Insert the thermometer ensuring that it doesn't touch the sides or bottom of the saucepan.
- Once the temperature is stable and hasn't changed for 30 seconds (depending on your thermometer this could take up to 3 minutes), check and record the temperature. It should read 100°C, unless in areas of higher altitude (see below for more info).
- Do this three times to make sure it is consistent. A variance of between 99°C and 101°C is ok. If it is more than you should replace your thermometer or have it serviced.
Altitude and thermometer calibration
Boiling points are lower at higher altitudes due to atmospheric pressure. If you are at a higher altitude, take note of what your boiling temperature should be and adjust it to suit. Here is a guide of boiling temperatures at different altitudes.

More boiling temps at altitude here: https://www.foodauthority.nsw.gov.au/help/calibrating-thermometers
Regular thermometer calibration and keeping records
It is recommended to calibrate your thermometers every 6 - 12 months or as suggested by the manufacturer.
Using a digital food safety app like Chomp makes it easy to schedule in regular calibration reminders as well as recording results which can be shown to an auditor.
Want to see how Chomp can make your life easier? Checkout our online demo.